


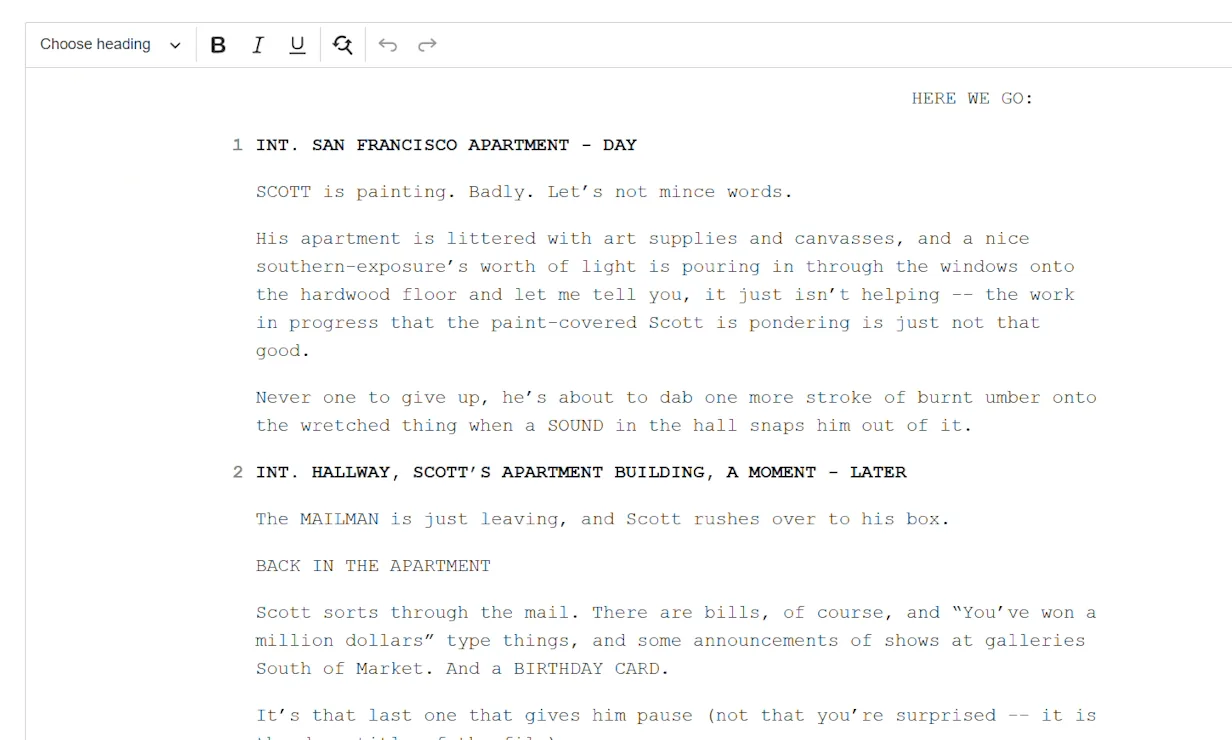
Skip weeks of pre-production. Upload your script and get a complete storyboard, shot list, screenplay, and animatic — powered by the best AI models available.
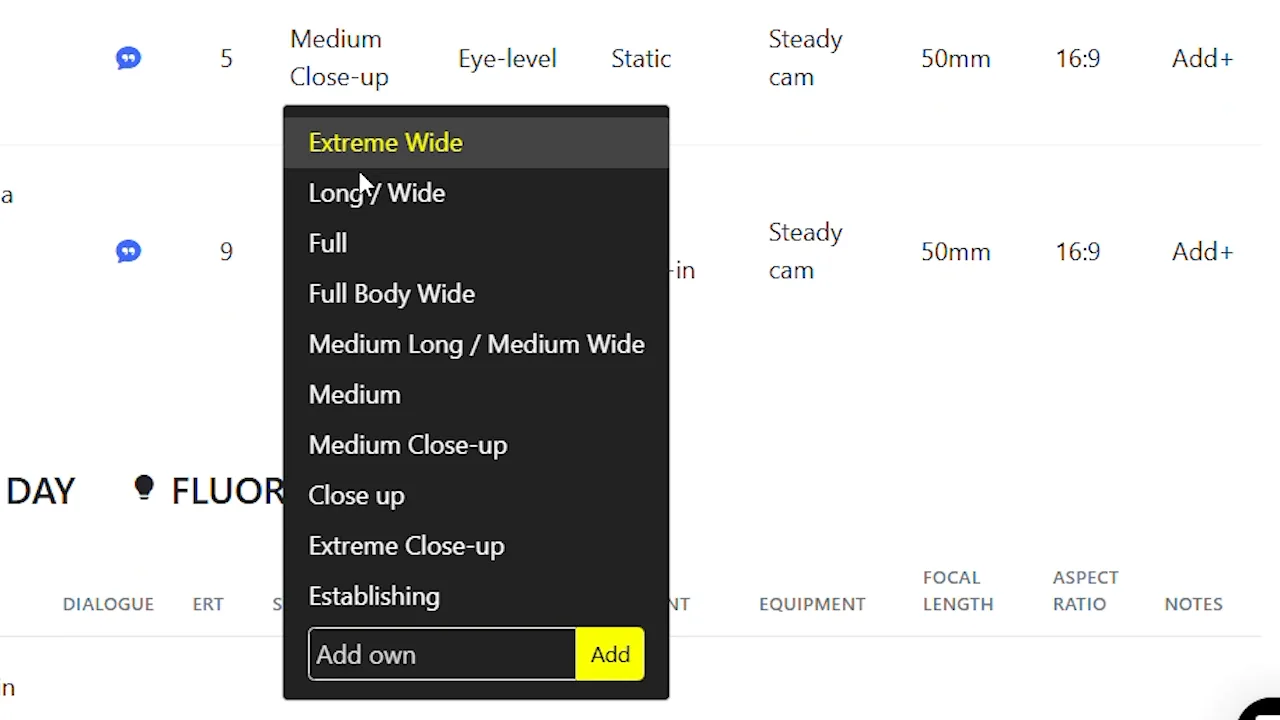
Take full control of your storyboard compositions. Set precise camera angles — from bird's eye to low angle, dutch tilt to over-the-shoulder — and get cinematic results that match your director's vision exactly.
Try It Now →From script upload to final animatic — see every step of the process.

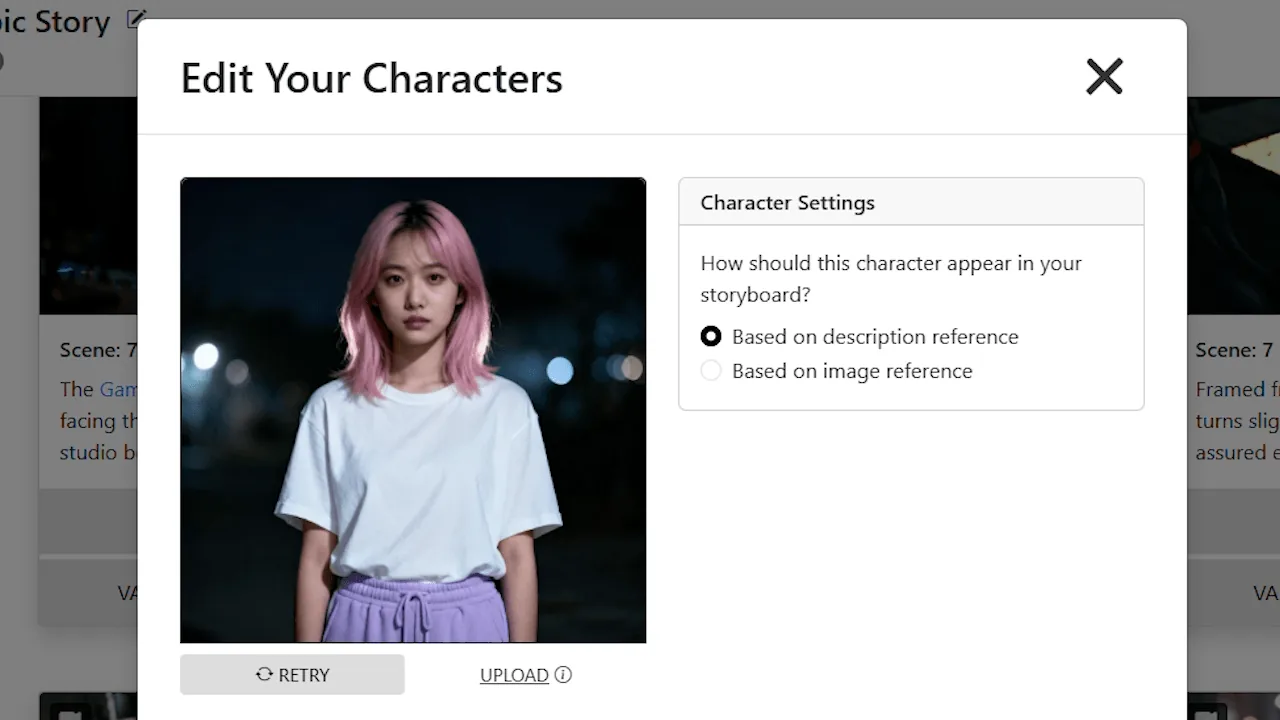


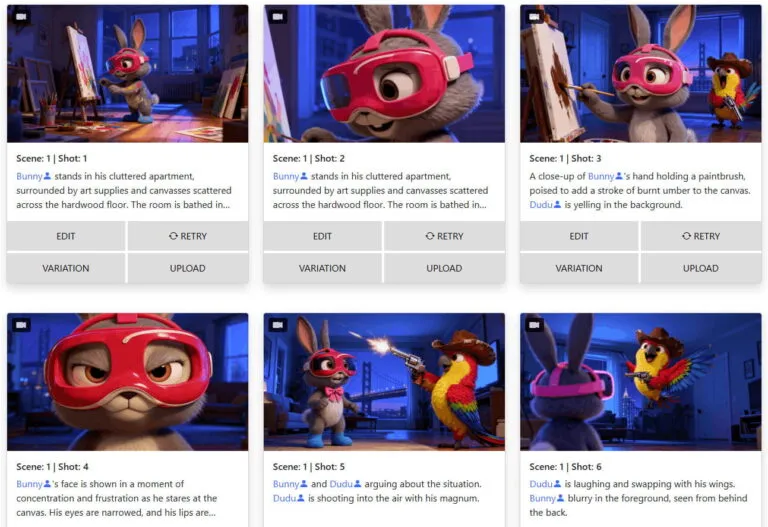
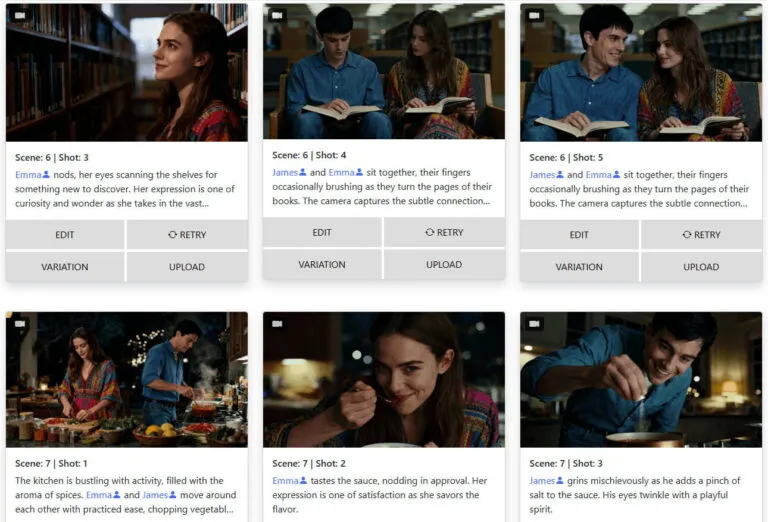
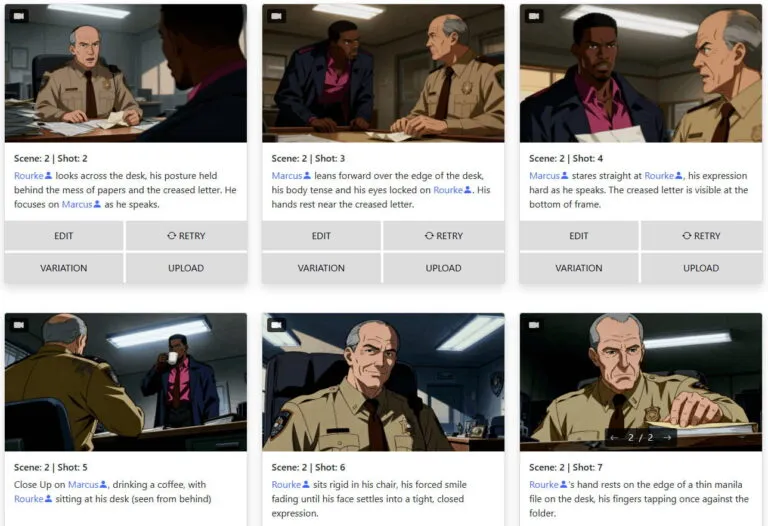
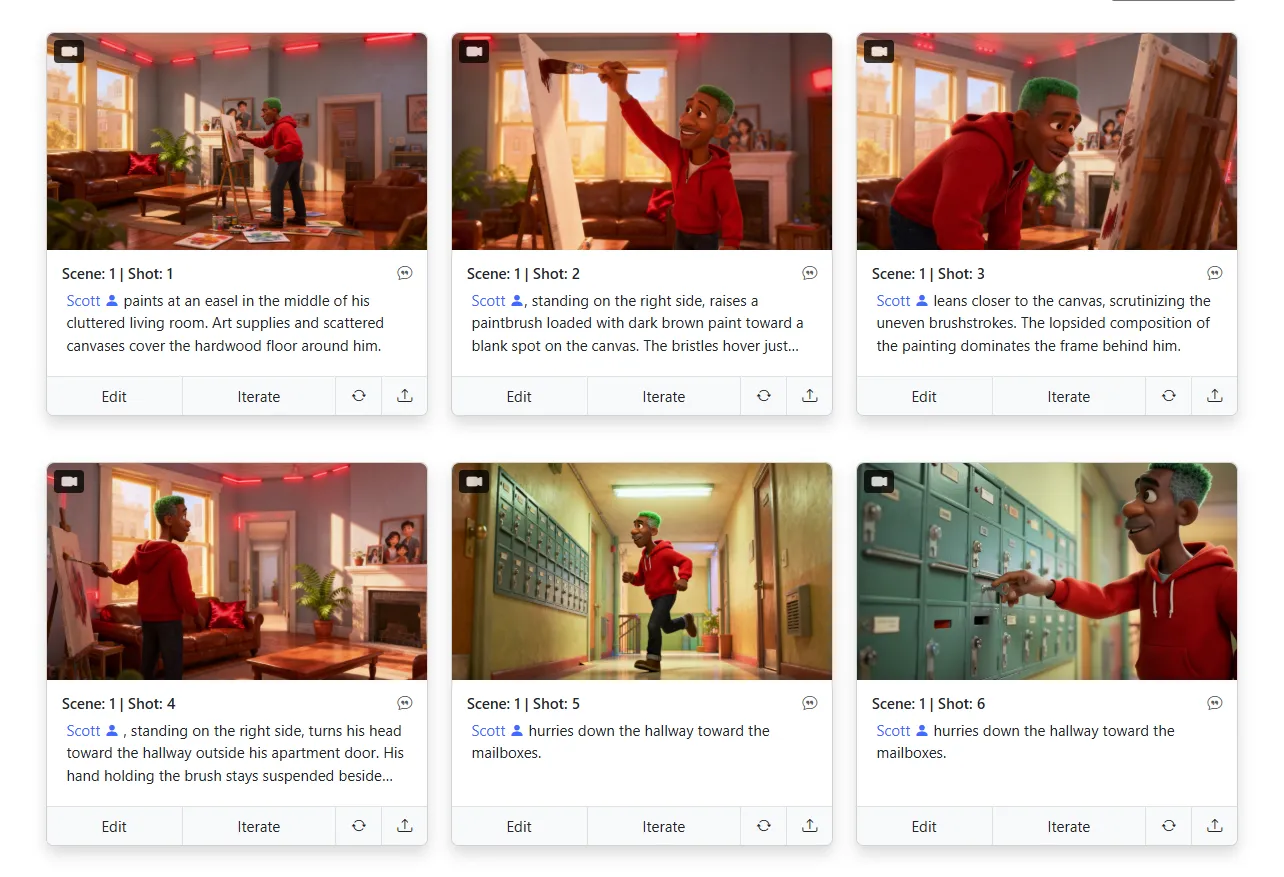
Your characters look the same from shot to shot. Your locations stay recognizable across every scene. Our AI locks in visual consistency — so your storyboard reads like one cohesive story, not a patchwork of random images.

Upload your script or describe your concept — and get a complete shot list, full storyboard, and animatic generated automatically. One input, every deliverable your production needs.


Find the exact camera position for any shot — without reshooting. Based on a single storyboard image, our 3D camera tool lets you orbit, pan, and reframe the scene until you land on the perfect angle.

Regenerate, refine, and rework your storyboard images as many times as you want. There are no credits to run out of and no per-image fees. Your creativity should never be limited by a counter.

Turn your storyboard into a polished pitch deck instantly. Choose from multiple professional designs and export a presentation-ready deck — perfect for pitching to studios, investors, or clients.
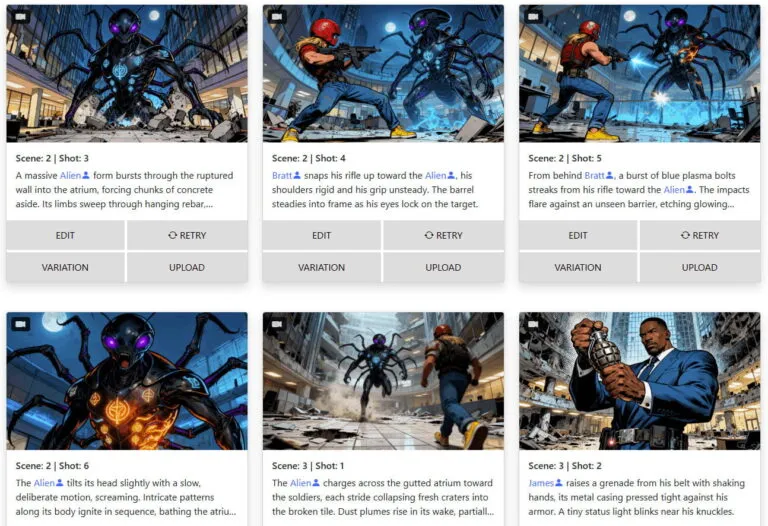
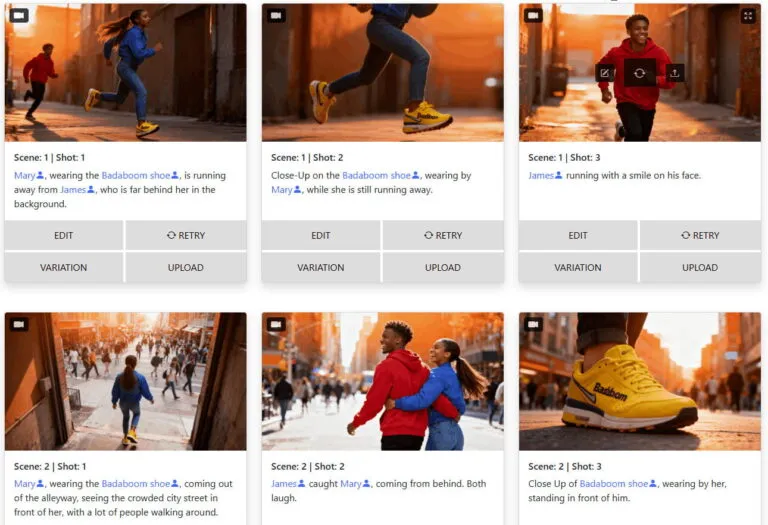
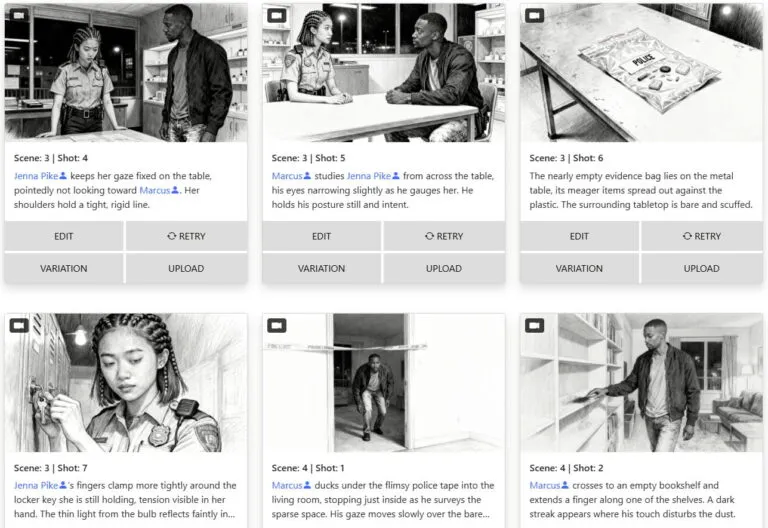
Real storyboards generated by our users. From feature films to commercials, the quality speaks for itself.
Everything you need to know about storyboarder.ai — in under two minutes.
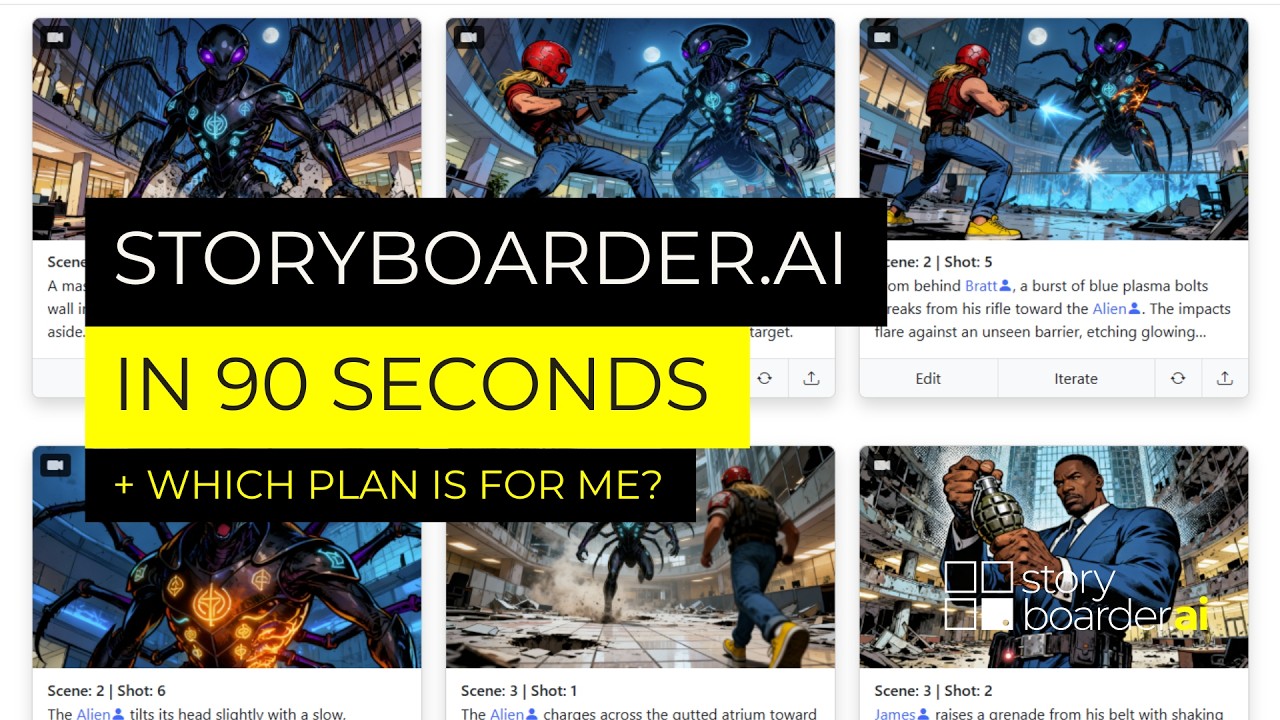
Video: Storyboarder.ai in 90 seconds — also available on the Help Center
Built by filmmakers, for filmmakers. Every tool designed for real production workflows.
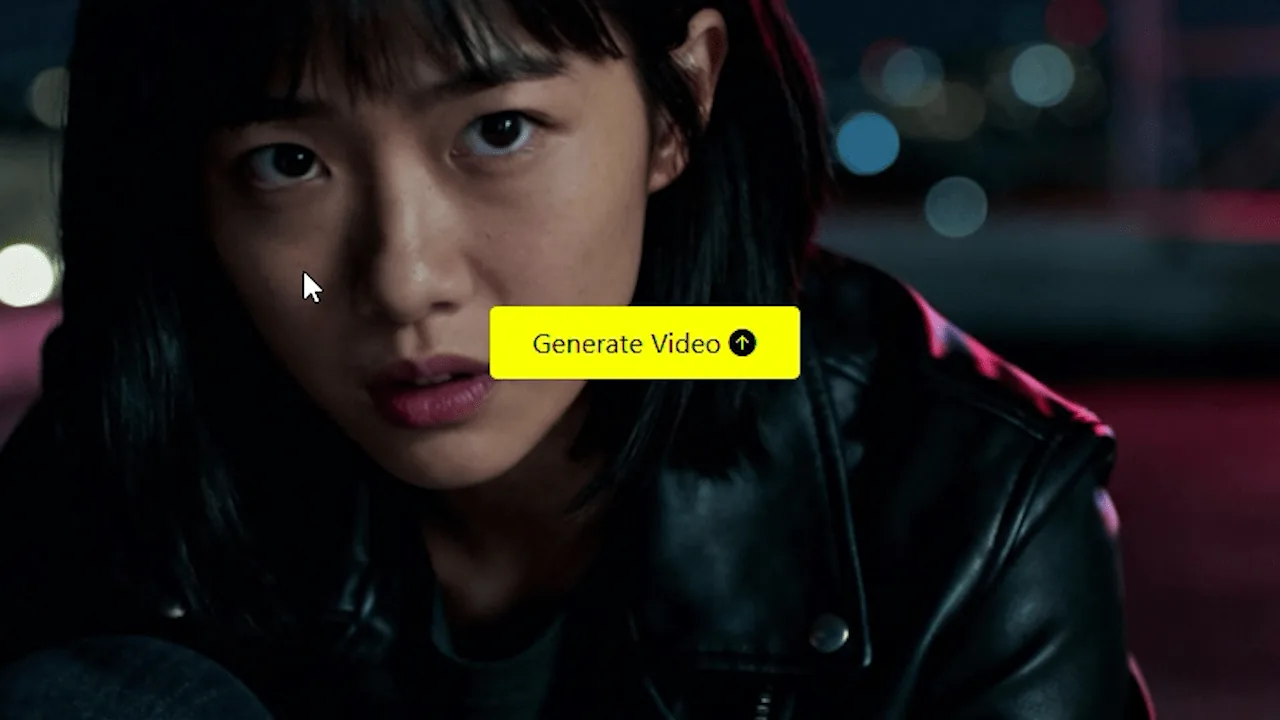
Transform your static storyboard frames into dynamic, cinematic animatics with AI-driven motion, camera movement, and audio. Industry-leading video quality for pitches, previs, and client presentations.
Hover to see more →Maintain recognizable characters, locations, and props across every frame — the most consistent AI on the market.
 Hover to see more →
Upload your napkin sketches and let AI refine them into polished storyboard panels — your creative vision, elevated.
Hover to see more →
Upload any reference image as your style guide. Comic, photoreal, anime — or your own proprietary look.
Hover to see more →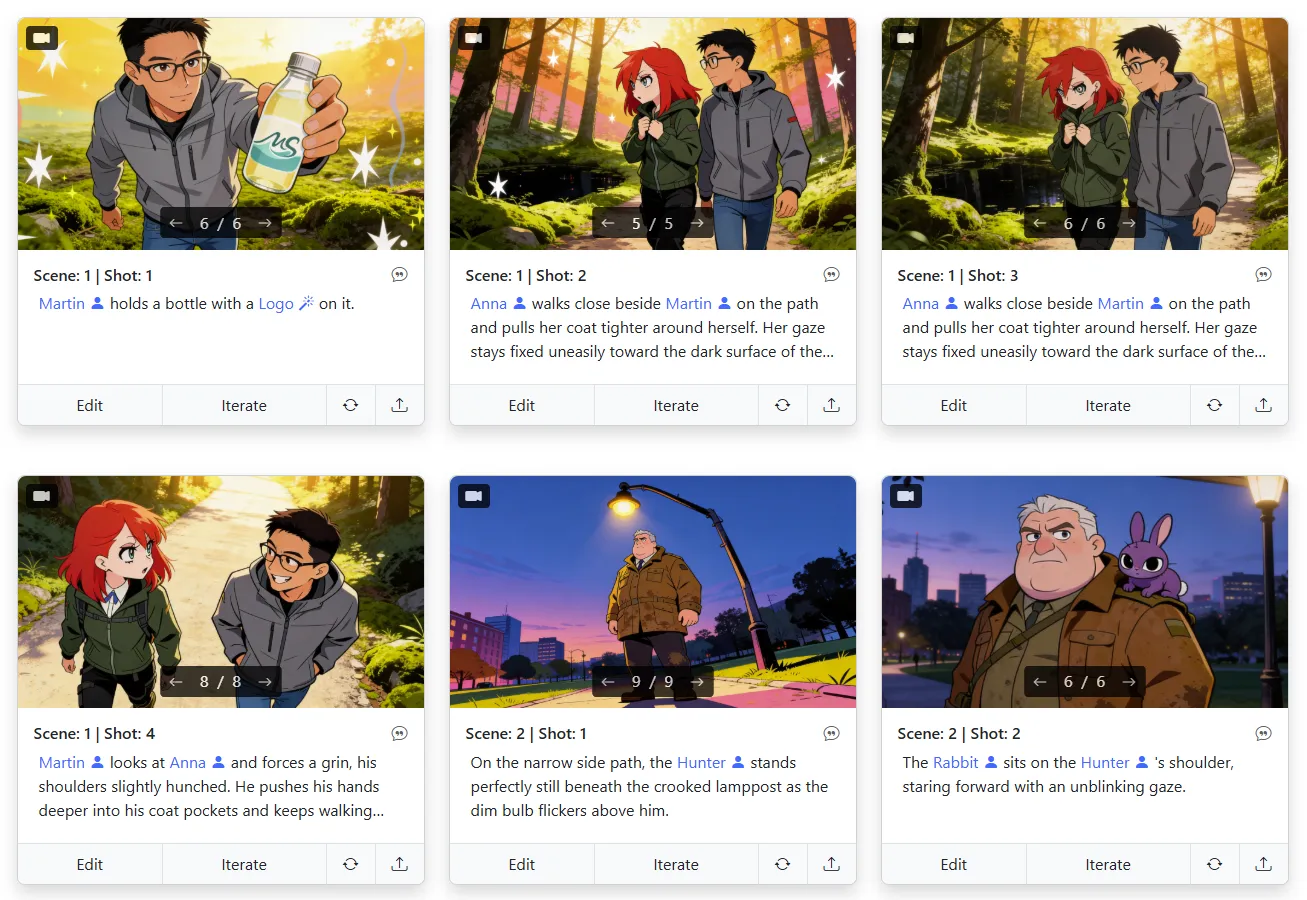
No credit system. No pay-per-image. Every plan includes unlimited image generation — iterate freely.
Hover to see more →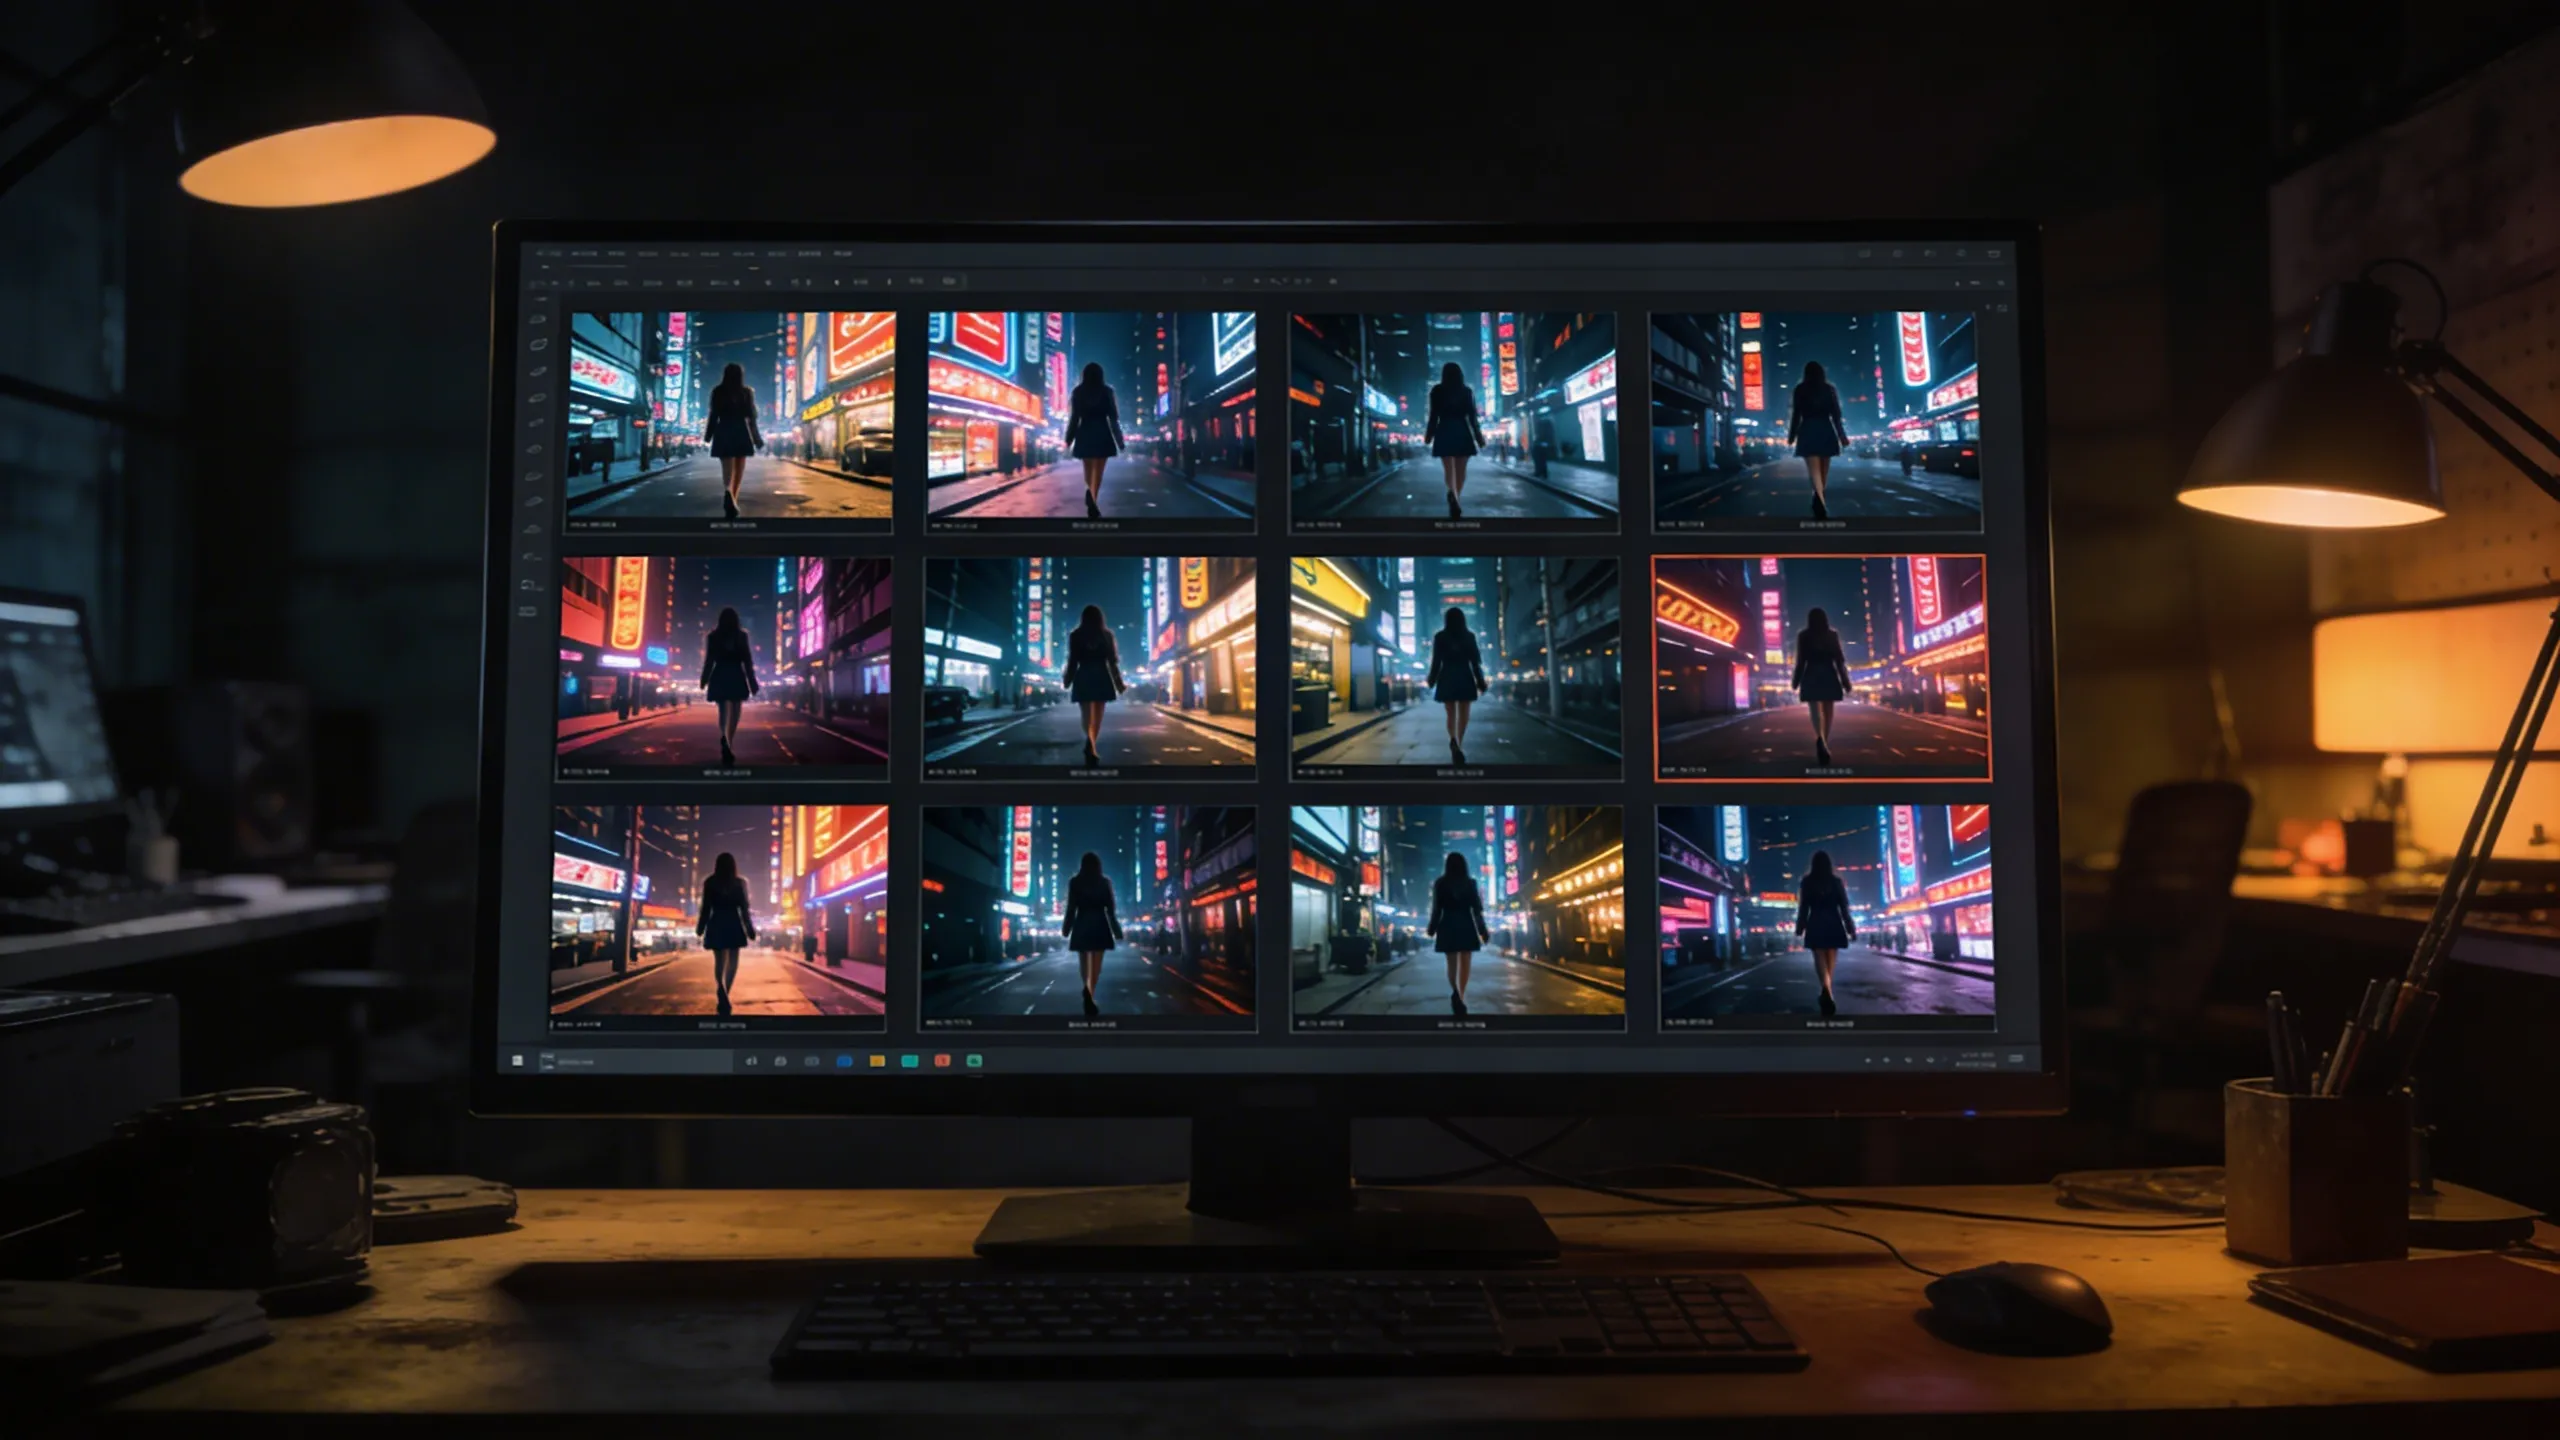
PDF, FDX, Fountain, Word, plain text — any script format works. Or just type your idea and go.
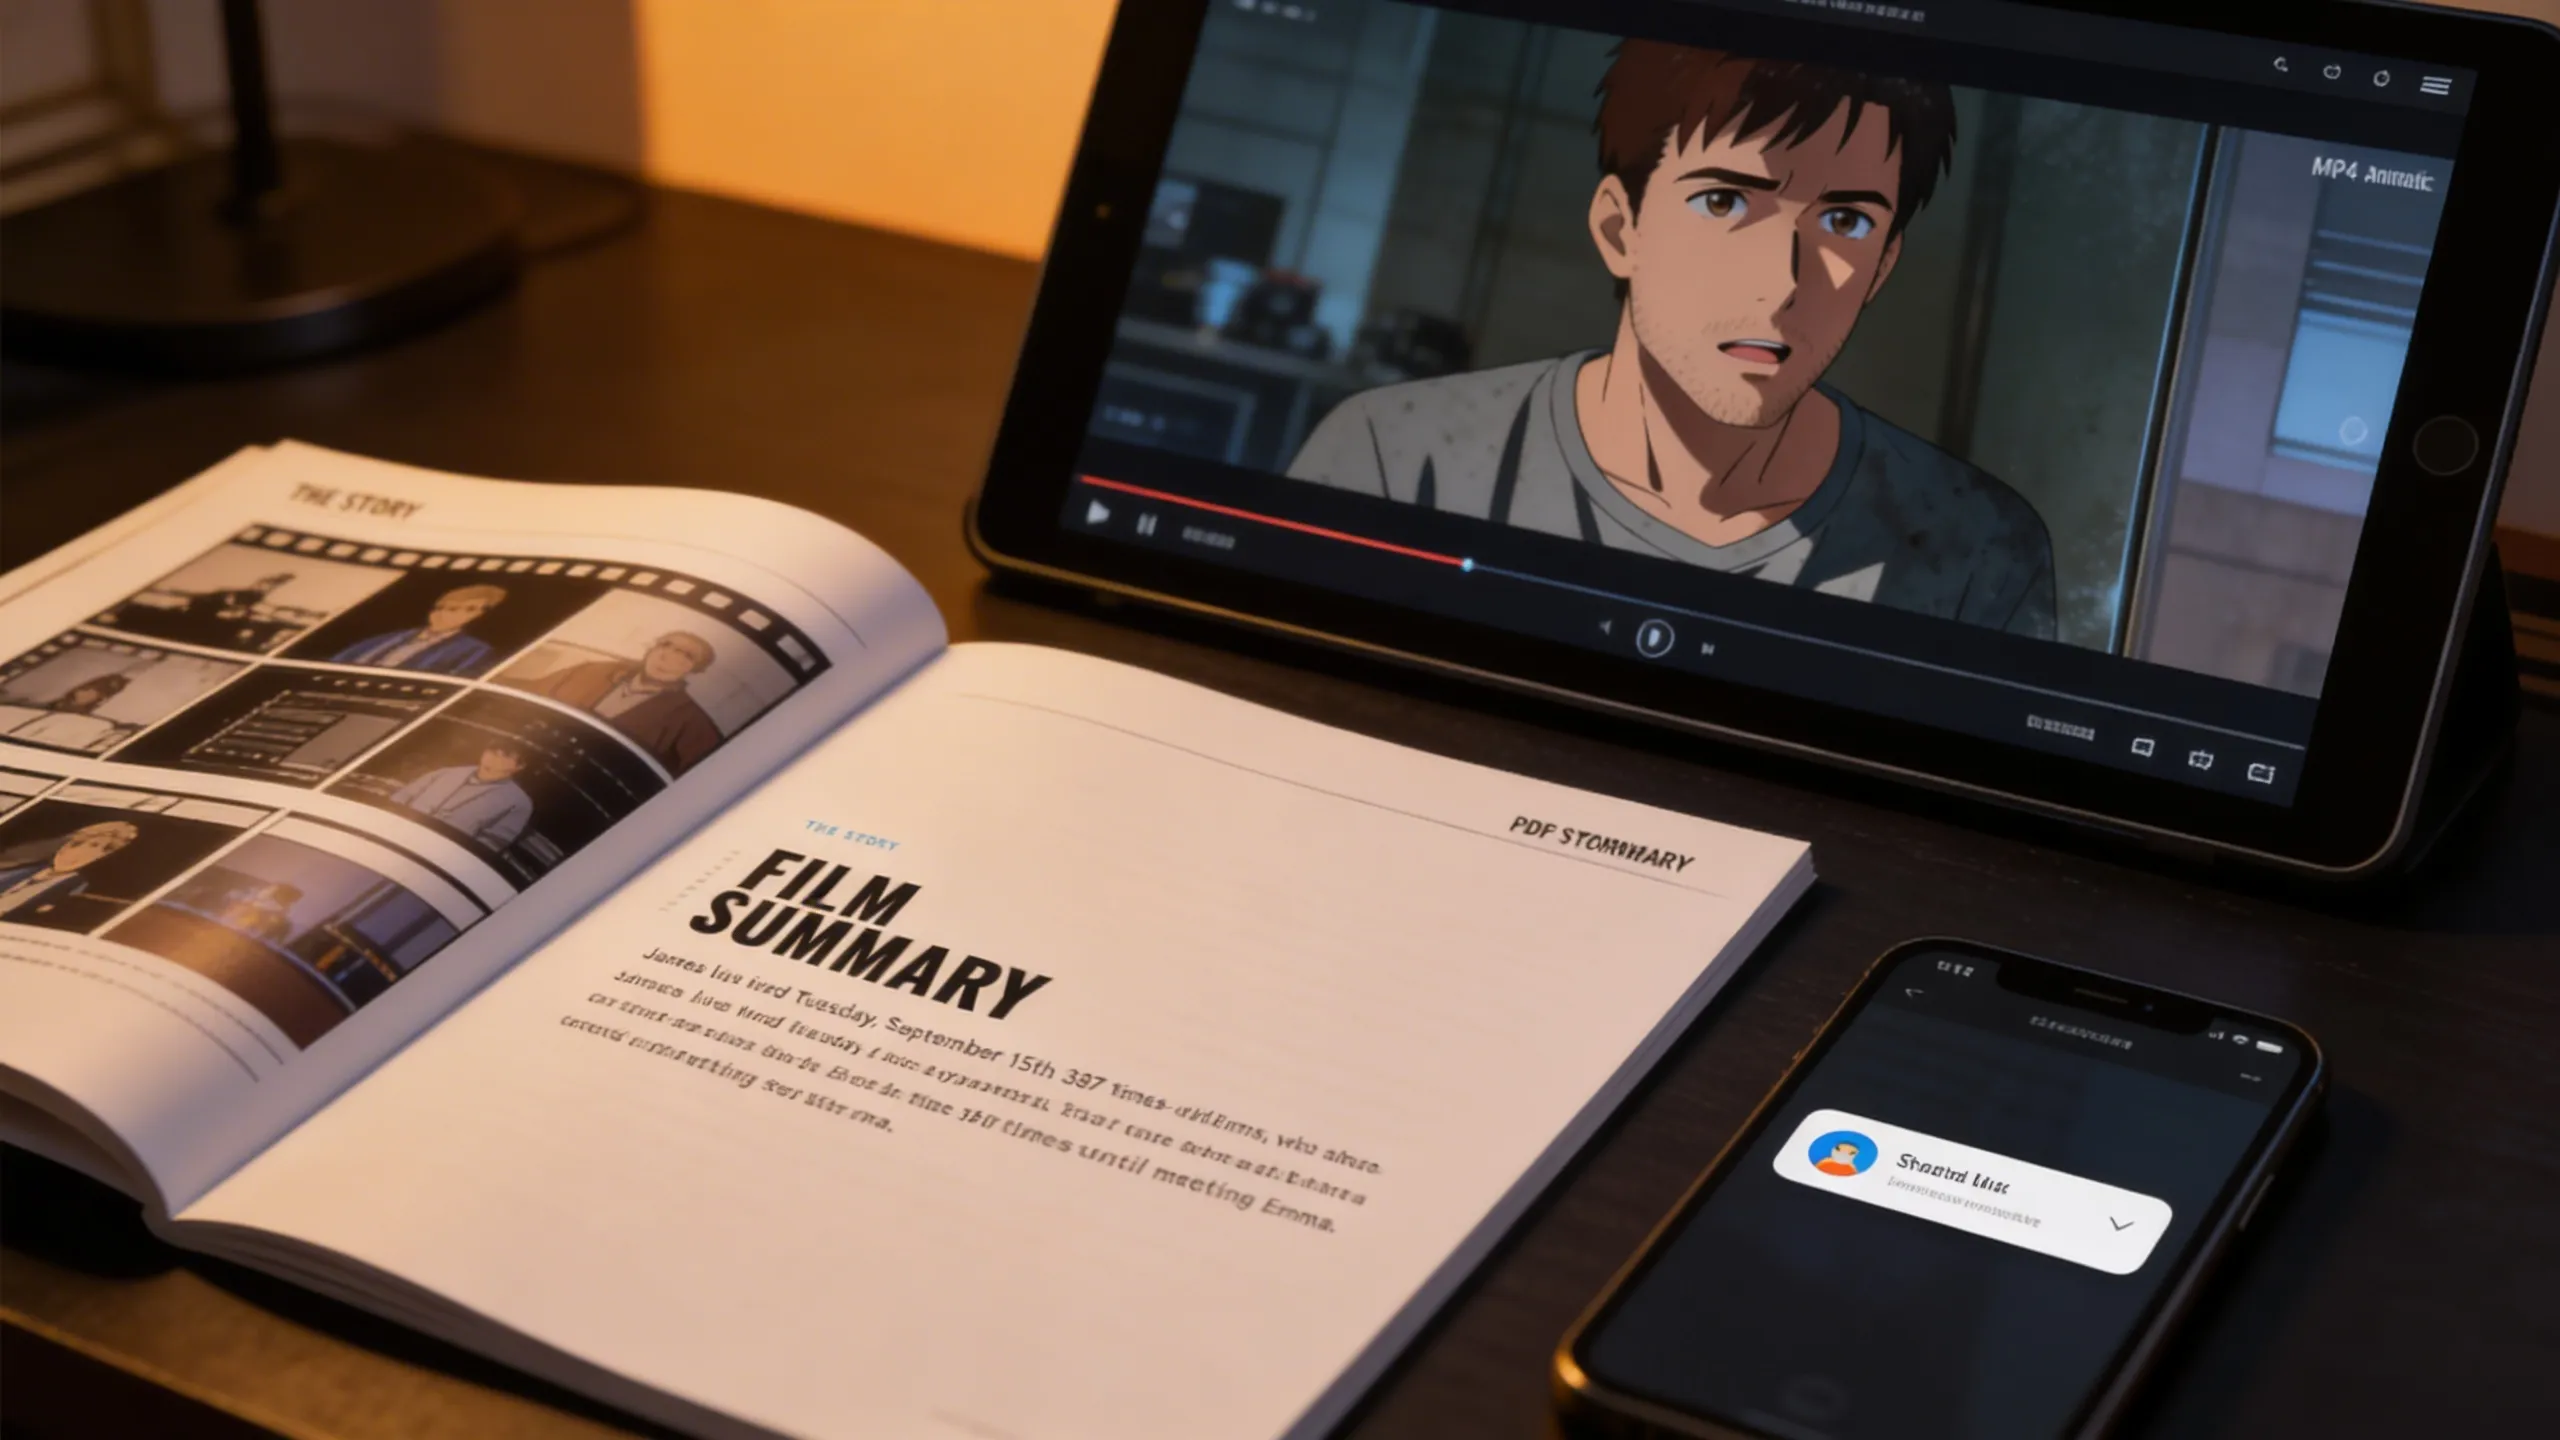
Export shot lists and storyboards as PDF, or generate MP4 animatics. Share directly with your crew and clients.

Whether you're shooting a feature film or a 30-second commercial, Storyboarder.ai adapts to your workflow.
Handle scripts of any length. Maintain consistent characters across hundreds of scenes. Present your vision to investors and crew with professional storyboards.
Pitch advertising concepts visually in minutes. Align with clients before a single frame is shot. Speed up approval cycles and reduce costly revisions on set.
Pre-visualize animated scenes, character motion, and shot flow before committing to production. Lock in art style and staging visually. Cut down on expensive rework by nailing the story first.
Perfect for indie filmmakers and film school students. Get a complete visual blueprint for your short without needing a professional storyboard artist.
Plan internal communications, training videos, and brand content. Keep stakeholders aligned with visual storytelling before production begins.
Visualize interview setups, B-roll concepts, and documentary sequences. Create reference boards that guide your crew through complex multi-location shoots.
"Storyboarder.ai has been transformative to my workflow — it makes the brainstorming for new projects really smooth and quick. It helped me speed up my pre-production workflow so I can focus more on the finer details of storytelling rather than on admin. I can thoroughly recommend the platform!"

"The platform has tons of user-friendly options, great attention to detail, and amazing customer service that makes everything easy and enjoyable."

"The AI generation is definitely better than other apps I've tried — more accurate and higher quality results. The shot list feature is fantastic for organizing everything."

"I really like that it's super intuitive and doesn't require much tech know-how. It makes the whole process feel seamless, allowing you to focus on what's most important — storytelling."

"The shotlist generator has been a big time-saver! I'm terrible at drawing. Using storyboarder.ai to take my script and generate a shotlist made it a very easy process."

"The ability to modify every single image is a huge time-saver. I can update the project according to client requests without having to start from scratch every time."

"The 3D camera angle feature is a game-changer. I can finally match the exact framing I have in my head — low angles, dutch tilts, over-the-shoulder — without sketching it out by hand. It's like having a virtual camera on set during pre-production."

"What I love most about Storyboarder.ai is its efficiency in generating storyboards and helping me organize my creative ideas seamlessly. It's become an indispensable tool for brainstorming and refining my projects, saving me time and helping me stay focused on the creative vision."

Overview
Purpose
Components and Roles
Common Deployment Patterns
Split-host (explicit proxy)
Transparent proxy via an intermediate Linux box (recommended when full transparency needed)
Policy-based routing to v2ray client on same LAN
Full-tunnel v2ray on RouterOS via container/third-party package (less common)
Key Protocols and Features to Consider
MikroTik Configuration Patterns (practical items)
Transparent Proxy Implementation Notes
Security and Operational Best Practices
Troubleshooting Checklist
Example Minimal Flow (policy-routing approach) v2ray mikrotik
Limitations and Considerations
References for Implementation (topics to search)
If you want, I can produce:
Running V2Ray on MikroTik devices is achievable via RouterOS v7.4+ container support, enabling ARM/x86 routers to run Docker-based V2Ray or Xray images. The process involves enabling container mode, setting up virtual ethernet interfaces, and creating NAT rules to route traffic through the containerized service. For detailed setup instructions, visit MikroTik Documentation. Container as VPN - General - MikroTik community forum
In the world of networking, is often seen as the rugged, reliable workhorse—a router that can do almost anything if you know which terminal commands to whisper to it.
, on the other hand, is the elusive shapeshifter, a sophisticated proxy designed to slip through the tightest digital borders without leaving a footprint. Here is a short story about their unlikely partnership: The Ghost in the Router
In a small, dimly lit office in a city where the internet felt more like a fenced garden than an open sea, lived a MikroTik RB5009
. It was a beast of a machine, handling hundreds of connections with ease, but its owner, Elias, had a problem. The "Great Firewall" was getting smarter, blocking his favorite research sites and slowing his encrypted tunnels to a crawl.
Standard VPNs were being snuffed out like candles in a storm. Elias needed something more discreet. He needed a ghost. He decided to introduce his MikroTik to The integration wasn't easy. MikroTik’s
was a strict disciplinarian, preferring its own internal protocols. But with the arrival of RouterOS v7 and its support for Containers , Elias saw an opening.
He spent hours at the terminal. He carved out a small, isolated "room" within the router—a virtual container—and installed the V2Ray core inside it. He then wove a complex web of Policy-Based Routing , telling the MikroTik:
"If traffic looks like a simple search, let it go. But if it’s destined for the restricted zones, hand it to the Ghost"
The first time he hit "Connect," the MikroTik hummed. Within the container, V2Ray began its work, wrapping Elias's data in layers of VMess and TLS, making it look like harmless background noise to any snooping eyes. Definitive Composition: v2ray + MikroTik Overview
Suddenly, the digital fences vanished. Elias watched his monitor as restricted pages loaded in milliseconds. The MikroTik stood firm, its LEDs blinking rhythmically, acting as the perfect physical shield for the invisible spirit living inside its circuits. The workhorse and the shapeshifter had become one. technical steps
to set up a V2Ray container on MikroTik, or are you looking for a different narrative style V2ray Client on Mikrotik - GitHub Gist
Integrating V2Ray with MikroTik is a powerful way to implement advanced proxy protocols (like VMess, VLESS, or Trojan) at the router level, ensuring all devices on your network benefit from encrypted, anti-censorship tunneling without individual configuration.
Since MikroTik’s RouterOS does not natively support the V2Ray protocol suite, the implementation typically follows one of two paths: Containerization (on ARM/x86 hardware) or Transparent Proxying via a secondary gateway. 1. Implementation Methods
RouterOS Containers (The Modern Way):If you have a MikroTik router with an ARM, ARM64, or x86 processor (like the RB5009, hAP ax series, or CCR2004), you can use the Container feature (introduced in v7.4). You can run a lightweight V2Ray or Xray-core Docker image directly on the router.
External Gateway (The Legacy/Flexible Way):For older MIPSBE or SMIPS devices, you cannot run containers. Instead, you set up V2Ray on a Raspberry Pi or a Linux VPS. The MikroTik then uses Policy Based Routing (PBR) or Mangle rules to redirect specific traffic to that V2Ray gateway. 2. Key Steps for Container Deployment (RouterOS v7)
To get V2Ray running natively on a compatible MikroTik, the workflow generally looks like this:
Enable Container Support: You must have physical access to the router to toggle the mode-button or perform a cold boot to enable the container package for security reasons.
Configure Virtual Networking: Create a veth (virtual ethernet) interface and a bridge to allow the container to communicate with the RouterOS environment.
Setup Environment Variables: Use the container/config menu to define your config.json location and any necessary environment variables for the V2Ray image.
Pull and Run: Pull a verified image (like teddysun/v2ray or v2fly/v2fly-core) and start the instance. 3. Routing Traffic (Transparent Proxy)
Once the V2Ray service is running (either in a container or on another device), you must tell the MikroTik which traffic to send through the tunnel:
Address Lists: Create a list of IP ranges or domains (using RouterOS v7’s dynamic DNS lists) that need to bypass local restrictions. v2ray is a modular, extensible proxy platform (part
Mangle Rules: Use /ip firewall mangle to "mark" connections originating from your LAN that match your destination address list.
Routing Tables: Create a specific routing table with a default route (0.0.0.0/0) pointing to the V2Ray container's IP address. 4. Why use V2Ray on MikroTik?
Protocol Obfuscation: V2Ray is significantly harder to detect via Deep Packet Inspection (DPI) compared to standard VPNs like L2TP or OpenVPN.
Centralized Control: Manage your entire home or office "clean" internet access from a single dashboard.
Split Tunneling: Use MikroTik’s powerful firewall to ensure only Netflix or specific work tools go through the proxy, while local traffic stays on the high-speed ISP line.
Note: Running containers can be resource-intensive. Always monitor your CPU and RAM usage in RouterOS to ensure the V2Ray process doesn't destabilize your primary routing functions.
Unlocking Secure and Private Internet Access: A Guide to Setting Up V2Ray on MikroTik
In today's digital age, ensuring the security and privacy of your internet connection is paramount. With the increasing concerns over data breaches, surveillance, and censorship, individuals and organizations are seeking reliable solutions to protect their online activities. One effective way to achieve this is by utilizing V2Ray, a powerful platform that provides a secure and private internet connection. When combined with MikroTik routers, which are renowned for their advanced networking capabilities, you can create a robust and secure internet access solution. In this blog post, we will explore how to set up V2Ray on a MikroTik router, enhancing your online security and privacy.
V2Ray is an open-source platform designed to provide a flexible and secure way to access the internet. It supports multiple protocols and can camouflage its traffic to mimic HTTPS, making it difficult for third parties to detect and block. This versatility and security make V2Ray a popular choice among individuals seeking a private internet connection.
MikroTik offers a range of networking equipment and software, with RouterOS being their flagship operating system for routers. MikroTik routers are known for their powerful features, affordability, and reliability, making them a favorite in both home and professional network setups.
We create routing marks for the traffic we want to bypass censorship. For example, route all traffic to non-China IPs through the V2Ray gateway.
# Step A: Mark connections from LAN
/ip firewall mangle add chain=prerouting src-address=192.168.1.0/24 dst-address-type=!local action=mark-connection new-connection-mark=v2ray-conn
Step 1: Enable Container Support
- Ensure you have the
container package installed (via System > Packages).
- Configure an external storage medium (USB/SD card) and format it.
- Enable container mode:
/system/container/set enabled=yes
Step 3: Advanced Domain-Based Routing (Using DNS)
To avoid routing everything (like Netflix or local banking), use MikroTik's DNS to identify blocked domains.
- Configure MikroTik DNS to forward to a local resolver (AdGuard Home or dnsmasq) that returns a specific IP (e.g., 192.168.88.11) for censored domains.
- In Mangle, add a rule:
/ip firewall mangle add chain=prerouting dst-address=192.168.88.11 action=mark-routing new-routing-mark=to-v2ray
This way, only when a user requests twitter.com (resolved to your fake IP) does the traffic hit V2Ray.
Recommended by: 


✦ Ready to Start? ✦ Your Story.
Visualized.
In Minutes.
Join 250,000+ filmmakers, agencies, and creators who've already transformed their pre-production workflow with Storyboarder.ai.
![v2ray mikrotik]()